Managing Your Project
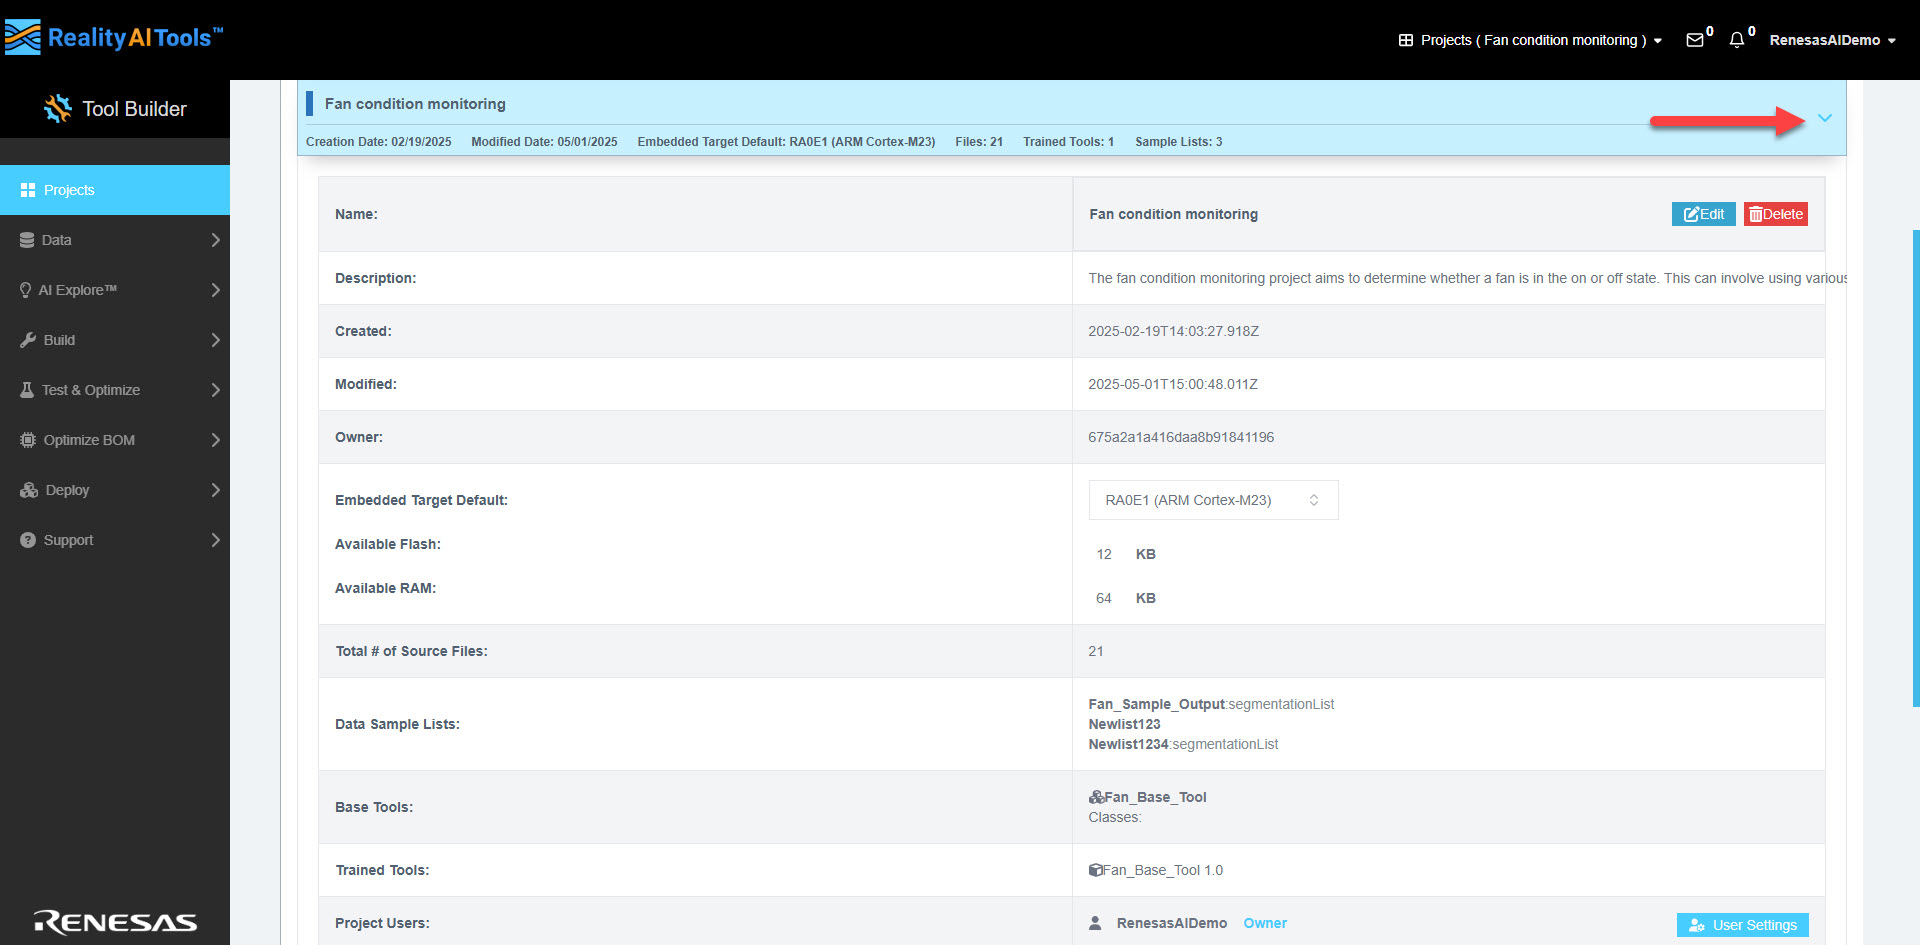
After creating a project, a new tab will appear with your project’s name. Click this tab to select that project and allow us to perform various functions in it. You can view the following project information:
| Field | Description |
|---|---|
| Name | The name assigned to the project during creation. |
| Description | A brief overview or summary of the project's purpose or scope. |
| Created | The date and time when the project was initially created. |
| Modified | The date and time of the most recent updates or changes made to the project. |
| Owner | The unique ID of the user who created the project. |
| Embedded Target Default | The default processor selected for deploying or testing the project, if applicable. |
| Available Flash | The total flash memory (in KB) available for the project, auto-populated based on the target processor. |
| Available RAM | The total RAM (in KB) available for the project, auto-populated based on the target processor. |
| Total # of Source Files | The total number of files uploaded to the project. |
| Data Sample Lists | A collection of segmented data samples associated with the project, used for training or testing machine learning models. In embedded environments, where quick decision-making is critical, large data files are broken into smaller, manageable samples on the Curate page. These samples are used to train the model and serve as inputs when the model is deployed on hardware, ensuring efficient and immediate predictions |
| Base Tools | The foundational tools created on the AI explore page for developing and analyzing the project. These include machine learning models or candidates available for experimentation, with details like accuracy and RAM usage. You can export or duplicate them on a server for further testing. The exported package generated on the backend is referred to as a base tool, representing the initial models built for the project. |
| Trained Tools | These tools are enhanced versions of the base tools, improved through additional training using project-specific data. Each iteration refines the model's performance, resulting in progressively tailored versions to meet specific project needs. |
| Project Users | A list of users with access to the project, along with their assigned roles and permissions. |
Name Section
Next to the project Name, you'll find the following options:
- Edit: Use this to modify the project name or description. You can also enable the Admin View Only checkbox if applicable. Click Update to save changes.
- Delete: Permanently removes the project from the system.
Project Users Section
Next to Project Users, you'll find the User Settings button, which allows you to manage who can access your project.
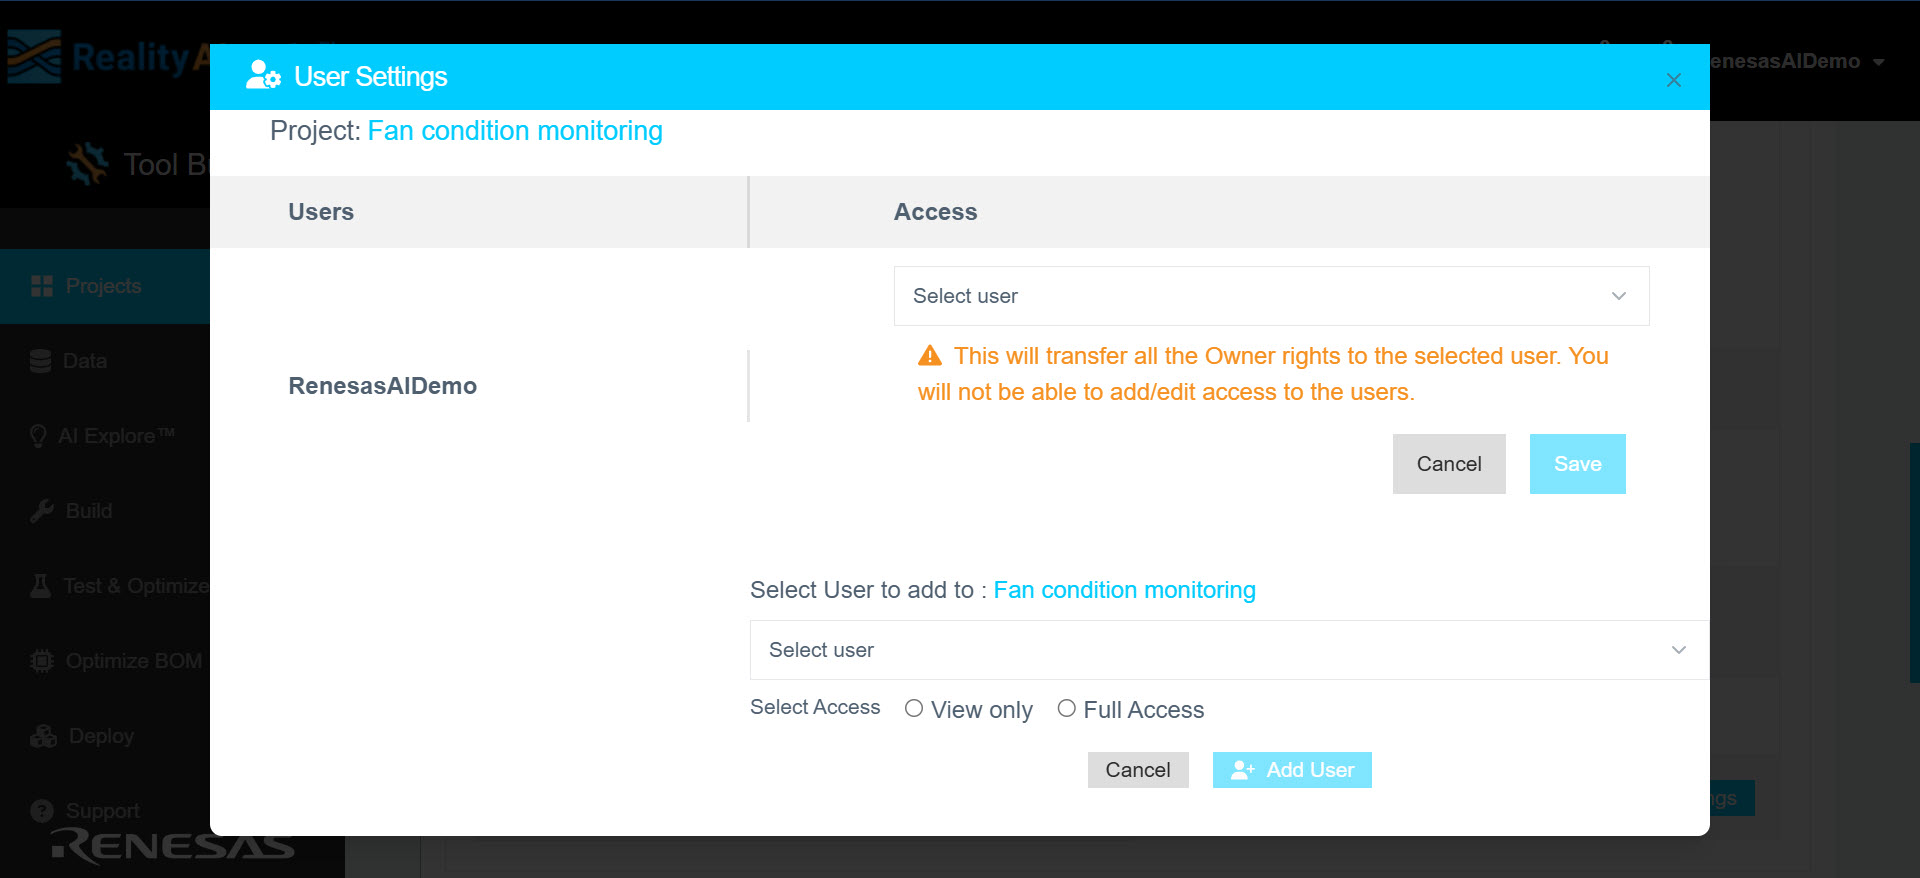
- Project Ownership:
If you created the project, you are automatically assigned as the owner.- In the Access section, you can transfer ownership by selecting another user from your organization.
- Once ownership is transferred, you will no longer have the ability to add or modify user access for this project.
- Click Save to confirm the ownership transfer.
- Adding Users to a Project:
In the Select Users to add to: [Project Name] field, choose users from your organization to add to the project.- Assign appropriate access levels:
- View Only: Grants read-only access.
- Full Access: Allows the user to view, edit, and manage the project.
- Click Add User to confirm the changes.
- Assign appropriate access levels:
This feature ensures seamless collaboration while maintaining appropriate levels of access and control over your project.