Connecting to Reality AI Tools
Follow these steps to authenticate Reality AI and configure data capture.
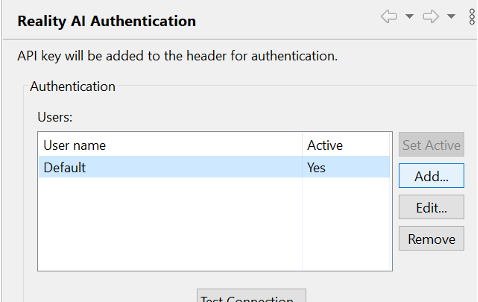
Authenticate with Reality AI
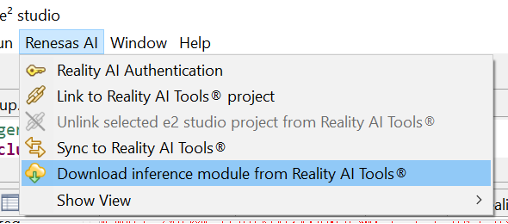
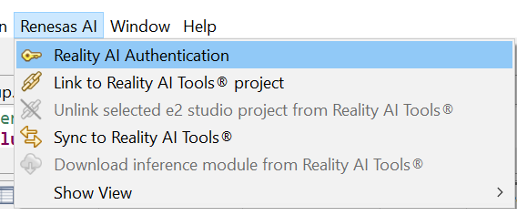
- Navigate to Renesas AI > Reality AI > Reality AI Authentication.
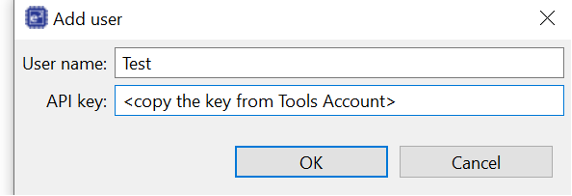
- Click Add to enter an API key and connect your account.
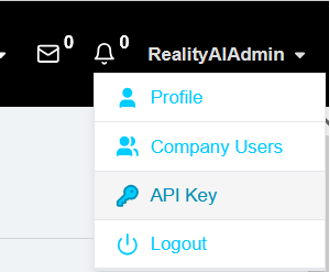
- Copy the API key from Reality AI Tools – API Key in your account.
- Return to the IDE, enter a name, and paste the API key.
The tools account is now connected to the workspace.
Using the Data Storage Tool
To view and capture the data:
- Navigate to Renesas AI > Reality AI > Show View > Data Storage Tool.
- In the Project field, select the appropriate project from the dropdown menu.
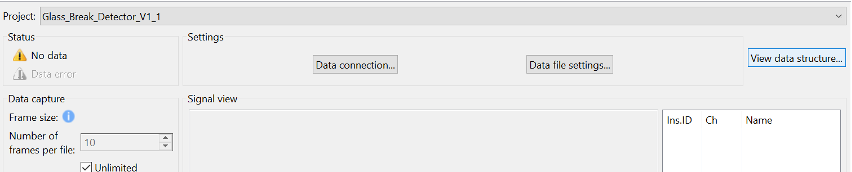
- Click View data structure.
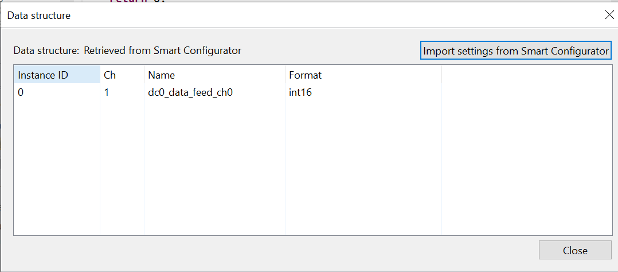
The Data structure pop-up window opens, displaying the project's data configuration.
-
Click Import setting from Smart Configurator.
The system retrieves data structure settings from the Smart Configurator and updates the table with relevant details.Data Structure Fields in Data Storage Tool
Field Description Instance ID Identifies the specific instance of the data feed. Ch Represents the data channel number assigned for the feed. Name Displays the name of the data feed. Format Defines the data type format used for the feed, such as Int16(16-bit integer). -
In the Status section, check for indicators such as No data or Data error, which highlight connectivity or data stream issues, as well as Receiving data indicating an established connection.
-
In the Settings section, click Data connection… to configure connection parameters.
The Connection Settings pop-up appears.
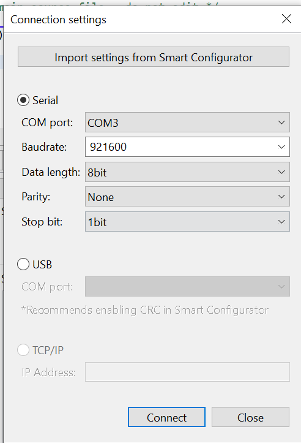
- Click Import setting from Smart Configurator.
This retrieves predefined connection parameters (instance ID, channel, name, and format) from the Smart Configurator to ensure compatibility with the hardware setup.
Setting Up the Connection
-
Select the appropriate connection type:
a. Serial Connection (Select Serial radio button)
- COM port: Choose the communication port assigned to the device.
- Baudrate: Defines data transmission speed (e.g.,
921600for faster transfer). - Data Length: Specifies the number of bits per packet (commonly 8 bits).
- Parity: Error-checking option (
None,Even,Odd). - Stop Bit: Defines the end of a data packet (1 or 2 bits).
b. USB Connection (Select USB radio button)
- COM port: Select the required communication port.
- Recommendation: Enable CRC in Smart Configurator to ensure data integrity.
c. TCP/IP Connection (Select TCP/IP radio button)
Note: Available in v2.3 release- IP Address: Enter the network IP address for device communication over a network.
-
In the Settings section, click Data file settings… to open the File settings pop-up:
- Output format:
CSV fileorWAVE file - Sampling rate (Hz): Select from dropdown
- Output folder: Choose folder to save captured files
- Click OK to apply.
- Output format:
-
Click Connect.
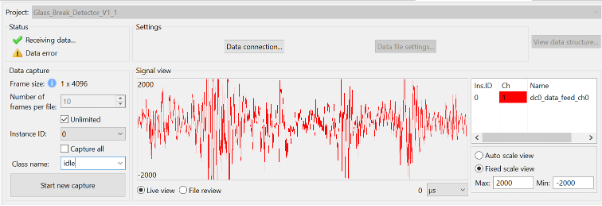
- View real-time data in Signal view.
- Select Line view or File view.
- Set time unit (e.g., microseconds).
- View Instance ID, Channel (Ch), and Name in right panel.
- Adjust scaling via Auto scale view or Fixed scale view.
-
In the Data capture section:
- Frame size: Displays frame size (non-editable).
- Number of frames per file: Displays number (non-editable).
- Unlimited: Check to allow variable-length capture.
- Instance ID: Displays ID.
- Capture all: Capture all available data.
-
Enter a meaningful name in the Class Name field.
-
Click Start new capture to begin.
-
Review captured metadata and file descriptions in Manage captured data files:
- Data file group: Create, name, or delete groups.
- Data table: View details (File name, Create date, Size, Class name, Sample rate, Status).
- Action buttons:
- Refresh
- Select all data
- Copy Data to Group
- Delete
- Edit metadata
- Editor path: Enter path for external editing.
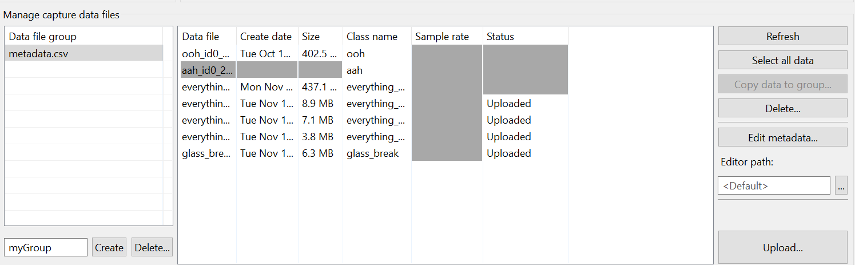
- Click Upload to transfer collected data to Reality AI Tools.
Reference: If you need further guidance, refer to the tutorial provided when your account was created, or contact rai-cs@dm.renesas.com.
Downloading and Syncing Models
Once a model is created, navigate to Renesas AI > Download inference module from Reality AI Tools to download and sync the exported model to e2 studio for integration.